Decking is one of the more common surfaces we work with, and it has its own quirks compared to concrete or pavers. The process is simpler in some ways, with no core drilling or concrete mixing, but timber’s unique traits bring details you really can’t skip, especially when aiming for quality glass fencing services.
Here’s what the process looks like from start to finish.
Understand the Surface Before You Start
Timber decking moves. It expands in heat, contracts in cold, and responds to moisture year-round. In North Texas, where temperatures swing hard across seasons, that movement is real and ongoing. Any glass fence installed on a timber deck has to account for it; otherwise, that movement transfers directly into stress on the panels and hardware.
This is the single most important thing to understand about deck installations. A setup that works perfectly on day one can develop problems over time if the deck structure underneath isn’t adequate or if the hardware isn’t suited to the surface.
Before anything else, inspect your deck. The joists beneath the areas where spigots will be installed need to be solid and well-supported. In many cases, doubling up the joists directly under each mounting point is the right call, especially for sections of the fence that will be exposed to wind. A glass panel in an open backyard acts like a sail in a strong gust, and the forces it transfers down to the mounting points are significant.
Step 1: Plan Your Layout
Mark the full fence perimeter on the deck surface using chalk or a string line. Note where each spigot will be positioned, where gate openings will go, and whether any sections run close to deck edges, stairs, or existing structures.
Keep one rule in mind throughout: every spigot needs to land on solid timber, not on a gap between boards or near a weak point in the substructure. Measure twice, map it out carefully, and confirm your layout accounts for local pool fencing code requirements before you order materials. In the DFW area, that means a minimum fence height of 48 inches and a self-closing, self-latching gate at every access point.
Step 2: Select the Right Hardware
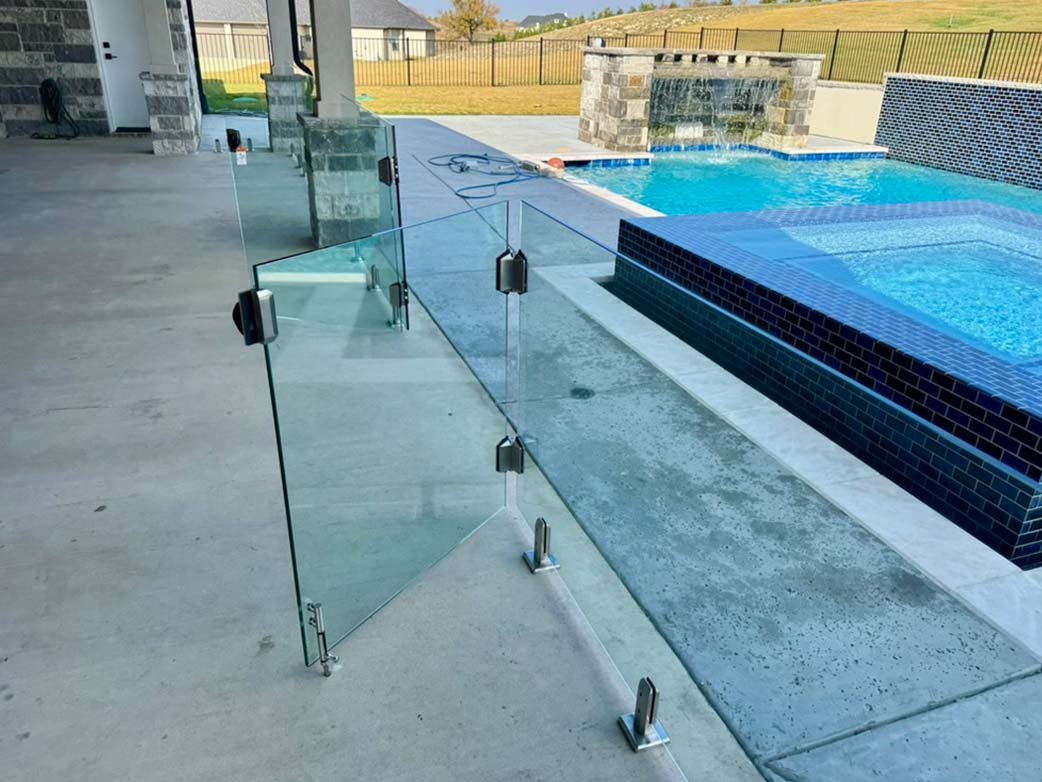
For deck installations, surface-mount spigots with base plates are the standard approach. The base plate sits flat on the decking surface and is secured using structural screws (sometimes called batten screws) driven down through the decking and into the joist below.
This is where hardware quality matters enormously. The spigots and screws need to be marine-grade stainless steel, rated for outdoor exposure, and resistant to the corrosion that pool chemicals and humidity cause over time. Undersized or low-grade fasteners compromise the entire installation and may not hold up to the lateral forces a fence panel experiences during high winds.
Every spigot base plate typically has four mounting holes. All four should be fastened, and every screw should go into solid timber, not just the decking board itself.
Step 3: Install the Spigots
With your layout marked and joist positions confirmed, pre-drill pilot holes at each mounting point to prevent the decking boards from splitting. Set each spigot in position, check it for plumb on two axes, then drive the structural screws to secure the base plate.
Work systematically from one end of the fence line to the other. After each spigot is set, check alignment with a string line before moving to the next. Correcting a misaligned spigot after the fact is significantly harder than getting it right during installation.
Step 4: Set the Glass Panels
Once all spigots are installed and checked for alignment, the glass panels can go in. Our installations use 1/2″ tempered and polished glass, and a standard panel in that thickness is heavy, typically in the range of 60 to 80 pounds, depending on panel size. Always use suction cup handles and work with at least one other person.
Seat each panel into its spigots with the rubber spacers properly in place. The glass must never make direct contact with the metal hardware. Once positioned, tighten the spigot clamps evenly and check that the panel sits plumb and flush with its neighbors before moving on.
Step 5: Install the Gate
Gate installation on a deck follows the same principles as any glass pool fence gate, but alignment is especially important here because deck surfaces are more susceptible to settling and minor shifts over time.
Hang the gate and set the hinge tension so it closes fully and latches from any position, including when pushed only partway open. Test it repeatedly from both sides. A self-closing, self-latching gate is a code requirement in most DFW jurisdictions, and it’s the most critical safety feature on the entire fence. If the gate ever fails to latch reliably, it needs to be adjusted before the pool is used again.
When to Call a Professional
Deck installations are manageable for experienced DIYers, but there are situations where professional installation is the right call. If your deck is older or showing any signs of structural wear, if the joists aren’t accessible for reinforcement, or if the fence line involves corners, elevation changes, or a complex layout, the margin for error is smaller, and the consequences of getting it wrong are higher.
We handle glass pool fence installations on decking throughout the DFW area regularly. Every project starts with a site assessment so we can evaluate your deck structure, confirm joist placement, and design a layout that meets code and holds up long-term. Our work is backed by a one-year installation warranty and a two-year product warranty on materials.
Contact us to schedule a free consultation. We serve Royse City, Rockwall, Dallas, Plano, Frisco, and communities across the greater DFW area.
Related Topics: